
A practical pattern file guide
How to combine sewing pattern PDFs at original scale
To join A4 or Letter pattern pages into one large sheet, use the designer’s assembly map to choose the pages, their order, and the border to remove. Then check the joins, finished dimensions, and existing size layers before printing.
A standard PDF merge puts pages into one document. Stitching places the tiles next to each other on one page. The finished sheet follows your pattern’s layout; it does not automatically become A0.
Four tiles, one checked sheet
Open the free interactive example to switch between the source pages and the stitched result.
This is Bloom’s original calibration example, not a customer pattern. Its small test sheets are 76.2 × 101.6 mm, not A4 or Letter. They make the assembly settings visible without sharing anyone’s sewing pattern.
Before: four separate pages
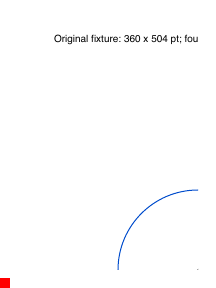
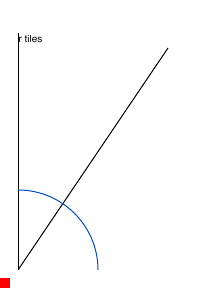
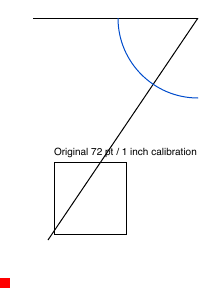
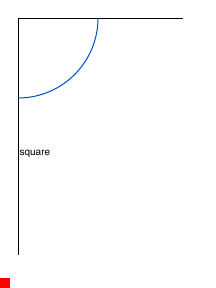
After: one joined PDF page
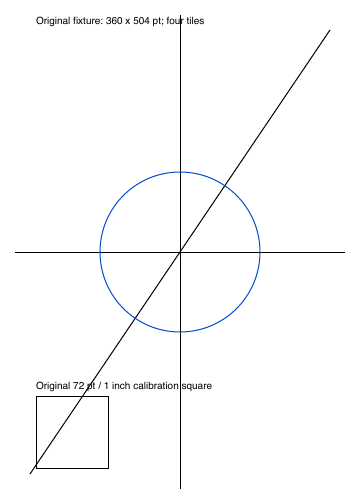
The output matches our original reference drawing in the checked render. Its existing Calibration layer still controls the drawing’s visibility. This example has one demonstration layer, not garment size layers; it does not establish compatibility with every designer’s file.
Inspect the original files yourself: four-tile example PDF · stitched example PDF. Both examples are free. Open the stitched file in a viewer with a Layers panel to try the Calibration toggle.
Combine your pattern in five steps
Choose the source PDF and assembly guide
Use a file you own or have permission to process. Find the designer’s page map and trimming instructions. Page labels printed on the pattern can differ from PDF page numbers, so match them to the thumbnails.
Bloom supports unlocked vector PDFs up to 10 MB and 100 pages, with uniform, unrotated pages and standard page boundaries. Scans, image-containing pages, forms, annotations, and mixed page sizes are unsupported. Every uploaded page must pass, including instructions. See the full file requirements.
Select pages in assembly order
Choose the PDF. We guess which pages belong together and put them on one sheet. If the lines do not meet, tap the other button and we try the next layout.
Set the border to remove
Follow the designer’s measurements. Bloom removes the same amount from all four edges of every selected page, from 0 to 50 mm. Enter 0 only when the pages join edge to edge. If the layout needs different trim on different edges, this flow does not support it.
Check the free preview
Compare the page order and the joins with your pattern’s page map. Look for breaks, doubled lines, missing marks or cut-off pieces, and check the sheet size. The whole-sheet picture and the close-up can’t check every join or your printer’s scale, so measure the test square when you print.
Download when you’re happy
Patterns of 12 pages or fewer download free. Bigger patterns are $5 USD for one stitched sheet, plus copy-shop panels, paid only after you’ve seen the preview. There is no subscription; printing is separate. Existing selectable layers are retained for supported files. Bloom does not create layers or choose your size: zero detected layers means the source has no named selectable layers for this tool to preserve.
You can also use a free tool
Choose the workflow that suits your file and the controls you need. You do not need a paid service to stitch sewing PDFs.
| Tool | What it offers | Cost and workflow |
|---|---|---|
| PDFStitcher | A desktop tool with page-grid, order, rotation, trim, and layer controls. Its tiling guide and layer guide explain the settings. | Free, open source. Download it and run the conversion on your computer. |
| Pattern Projector | A browser app for projection, with stitching and layer visibility controls. Its official changelog also documents PDF export with selected layers and stitched pages. | Free, open source. Use its browser workspace and export controls. |
| Bloom Pattern Stitch | A supported-file check, manual rectangular layout, and a free preview before checkout. Uses PDFStitcher for the conversion; keeps existing layers in supported outputs. | Free preview. Free download for 12 pages or fewer; $5 USD for bigger patterns. File uploads are processed by Bloom. |
The free-tool descriptions follow their published documentation. We have not established that every file or exported layer behaves identically across these tools.
Check size and layers before printing
Use the free sewing pattern paper calculator to compare Letter, A4 and copy-shop paper for your finished sheet.
“Original scale” means the conversion does not resize your pattern geometry. It cannot correct a source PDF that was already scaled incorrectly. Use the designer’s test square and measure a test print at 100% or actual size before printing the full pattern or cutting fabric.
A0 measures 841 × 1189 mm. A stitched sheet can be smaller or larger: Bloom reports whether its dimensions fit A0 in either orientation, without shrinking it. Confirm the exact sheet dimensions and file requirements with your print shop.
Open the finished PDF in a viewer that supports selectable layers. Check the size you want and any required labels, grain lines, or other markings. Ask whether your print shop needs you to save only the visible layers; Bloom preserves layers but does not perform that final size selection for you.
Have your file and assembly map ready?
See your own pattern as one sheet. The preview is free. 12 pages or fewer download free; bigger patterns are $5 USD. Printing is separate.
Check my PDF freeWritten by Bloom Web Services · Checked September 8, 2026